How Do I Allow People to Attach Documents to a Google Form Without Them Being Uploaded to My Drive
Using Google Forms
by - Eric Curts
Table of Contents:
What is Google Forms?
Creating a new form
Calculation collaborators to the grade
Editing the course description
Editing form questions 
Adding more questions and other items
Question types
1 - Text type
2 -Paragraph type
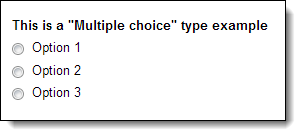
3 - Multiple Choice type
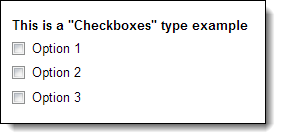
iv - Checkboxes type
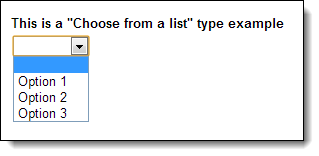
5 - Choose From a List type
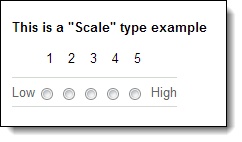
half dozen - Calibration type
7 - Grid type
8 - Time type
9 - Date type
Inserting images
Inserting videos
Adding section and page breaks
Changing what happens after a form is submitted
Changing user settings for the form
Changing the theme of the class
Choosing where class data is saved
Sending the class out to users
Viewing responses to your form
Viewing a summary of responses as charts and graphs
Getting notified when a course is submitted
What is Google Forms?
| Google Forms is a costless tool from Google that allows you to do the following:
|
You access Google Forms through the Google Bulldoze scre en or the Google Forms web app .
Y'all can use Google Forms with your personal Google account , or through a Google Apps for Education account . With a Google Apps for Pedagogy account y'all can also do the post-obit:
- Crave that respondents be from your Google Apps domain.
- Collect respondents usernames.
C reating a new form
In one case yous are in Google Drive you lot can create a new grade as follows:
- Click the New button in the height left corner .
- Then click More than from the drop-downwards menu.
- Finally click Google Forms from the popular upward carte.
- Your blank class will now be created.
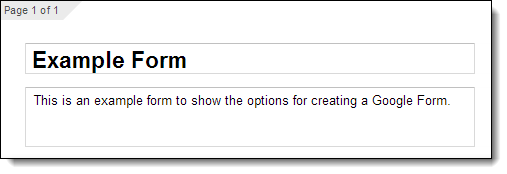
- To name your form, type the title in the box where is currently reads Untitled form . Y'all can always modify this later on.
- Your form is now prepare for you to edit.

Adding collaborators to the form
But like with other Google Documents, yous can give other people edit rights to collaborate on the creation of your grade. To add collaborators:
- From the edit mode of the form click File in the summit carte bar.
- So click Add collaborators...
- The normal Sharing settings window will open up where you can share the form with other people.
Editing the course description
After creating your course, yous tin optionally add text for a description. Ordinarily this is where you tin explicate to the user the purpose of the form, any special directions, or other helpful information.
- Below the title of the form, there is a box labeled Form Description .
- Simply click and type in that box to add your description.
- You lot can include spider web addresses in the description box and they volition show as clickable links on the live form.
Editing grade questions
When you create your form, your outset question will exist created as well. You can edit the question every bit follows:
- For Question Title yous can type in the question y'all wish to ask.
- For Help Text y'all can add together additional directions or clarification for the question.
- For Question Type you lot tin can cull between nine unlike types of questions (explained later on).
- If the question type needs a list of answers (such as multiple selection or checkboxes) then you can fill in the available answers.
- To force the user to answer the question, check the Required question box.
- Click Washed when finished.
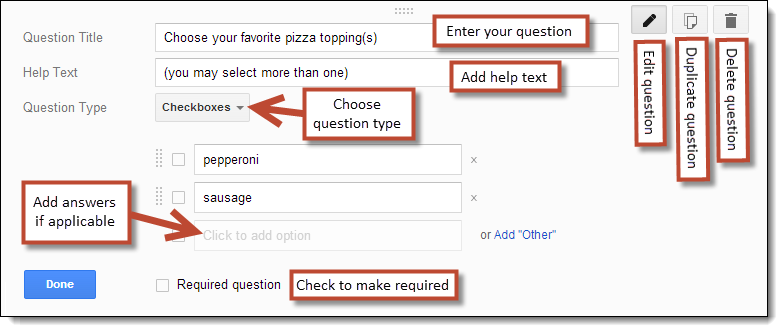
At whatsoever fourth dimension y'all can also do the following to a question:
- You can edit a question by clicking the edit button (the pencil icon) in the height correct corner.
- Yous can duplicate a question by clicking the duplicate push button (the double-page icon) in the acme right corner.
- You can delete a question past clicking the delete button (the trash can icon) in the top right corner.
- Y'all can change the gild of questions by clicking and dragging a question to a new location.
A dding more than questions and other items
In addition to the one question you begin with, you can add more questions and other items to your form.
| |

Question types
There are 9 dissimilar types of questions you can include in a form:
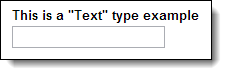
ane - Text type
| |
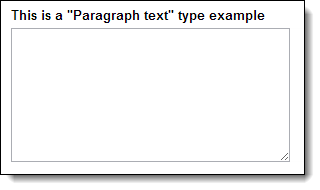
ii - Paragraph type
| |
3 - Multiple Choice type
| |
4 - Checkboxes type
| |
five - Cull From a Listing type
| |
6 - Calibration type
| |
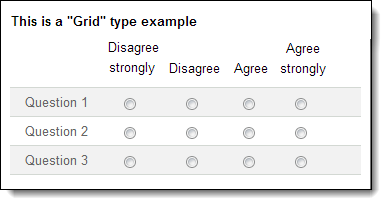
7 - Filigree blazon
| |
8 - Time type
| |

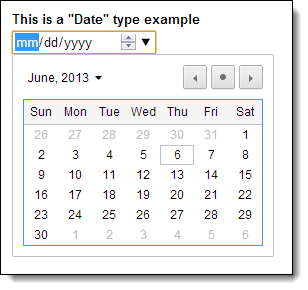
9 - Appointment type
| |
Inserting images
You tin also insert pictures in your form, and can place them before or after a question or other office of your form. This is peculiarly useful for quizzes to show the user maps, charts, and other images related to the questions.
- To add a picture click the Add Item push button or click Insert in the top carte bar.
- And so choose Epitome from the drop-downwards bill of fare.
- The normal Google Docs Insert image window volition open giving you many options for selecting the picture.
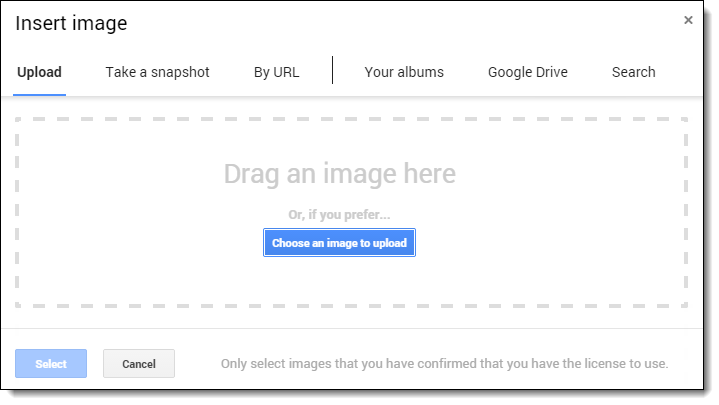
- Upload - You can browse your difficult drive or network drive to locate and upload an image.
- Take a snapshot - If you have a webcam, y'all can take a pic and insert that.
- By Url - Y'all tin can paste the web accost of an prototype that is already online.
- Your albums - If yous save pictures in Google+ Photos or Picasa Web Albums, you can browse through your albums and insert any paradigm.
- Google Bulldoze - Select images saved to your Google Bulldoze or shared with you from others through Drive.
- Search - Yous tin can search for image from several online sources:
- Google - A search of Google Images for public-domain pictures
- Life - Pictures from Life Magazine
- Stock Images - These are high quality clipart images
Annotation : Once you insert an image into the form you tin click and drag it to place information technology elsewhere in the course, just like you tin can do with class questions.
Inserting videos
You tin as well insert YouTube videos in your grade, and can identify them before or after a question or other part of your form. This can exist useful for quizzes where the user needs to lookout a video and so respond to related questions.
- To add a video click the Add Particular button or click Insert in the height card bar.
- Then choose Video from the drib-downward menu.
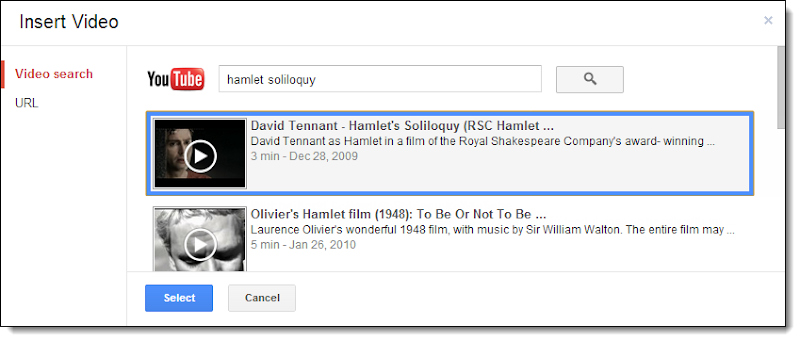
- This will open the Insert Video window where y'all can search for a YouTube video or paste in the video URL.
- One time you choose the video yous desire, click Select at the lesser to add it to your form.
Note : Once y'all insert a video into the form you can click and drag information technology to place it elsewhere in the course, merely like you can do with grade questions.
Adding section and folio breaks
If your form has a lot of questions you may want to suspension it up with section breaks or page breaks, and provide additional structure and information to the user.
To add a section pause :
- First click the Add Detail button or click Insert in the top menu bar.
- Then choose Section header from the driblet-downwardly bill of fare.
- You lot can at present enter in a section title in the Header text box.
- Optionally you lot can type in more information in the Description box.
- Click Done when finished.
- Now you can click and drag the section header to whatever location in the grade you want.
To add together a page pause :
- Outset click the Add Item button or click Insert in the elevation card bar.
- Then choose Page break from the driblet-down menu.
- Optionally you can now enter in a folio title in the Page title box.
- Optionally you can type in more information in the Description box
- Click Done when finished
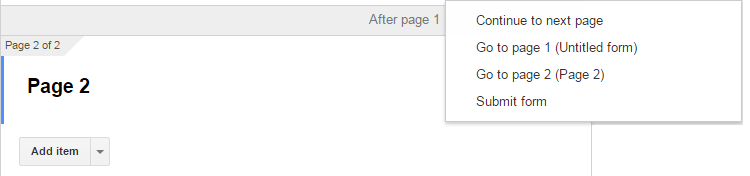
- Now yous can click and elevate the folio break to whatsoever location in the form you desire.
- You can also determine where the user goes later on a folio intermission such as the adjacent page , a specific page , or grade submission .
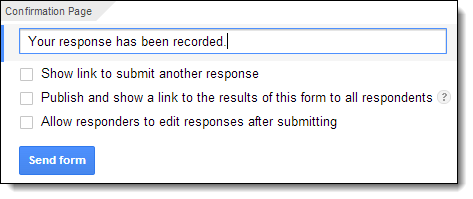
Changing what happens later a course is submitted
At the bottom of the form is a section titled Confirmation Page where you tin command what happens after a user submits the course. This includes the following:
| |
Changing user settings for the grade
If you are using Google Forms through a Google Apps domain, there are several user settings that you tin change for your Google Form. Each of these are controlled at the top of the class by selecting (or not) checkboxes.

- Require [your domain] login to view this course - If you cheque this box and then people will need to log in with a valid Google Apps business relationship from your domain (such equally your schoolhouse) to access and complete the course.
- Automatically collect respondent'south [domain] username - This checkbox will determine if the form is anonymous or not. If y'all demand to know which user goes with which responses (such every bit students completing the form as a quiz) then bank check this box.
- Show progress bar at lesser of course pages - helpful for multi-page forms
- Only allow one response per person (requires login) - Only allow a user consummate the form 1 fourth dimension.
- Shuffle question order - Rearrange the order the user sees the form questions. Useful for randomizing quizzes. Notwithstanding, not good if you have added images or videos to the form, every bit they will be shuffled as well.
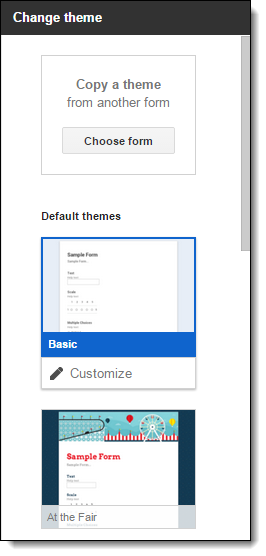
C hanging the theme of the grade
| Google Forms offers a large variety of themes to choose from to alter the colour and way of your form. To change your form's theme:
| |

Choosing where class data is saved
Before you tin can accept users actually make full out your course, you lot will demand to practise one last step, which is to choose where the user responses to the form will exist stored. This is a one time task to give Google Bulldoze permission to create a Google Spreadsheet each time to concur your Form responses. Y'all only have to exercise this in one case always.

| |

S ending the form out to users
| When your form is set, you tin can make information technology available to users in several ways.
| |
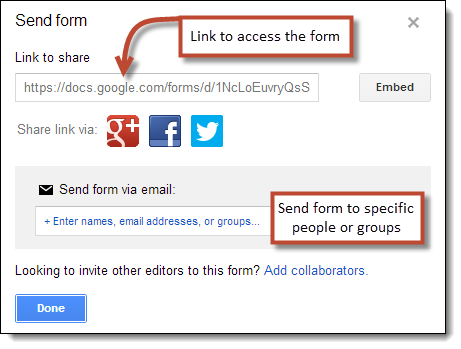
- Another option is to copy the class link from the Link to share box. You can then share that link with users in many ways:
- Mail service the link on your website, web log, forum, or other online source.
- Put the link inside some other document and share that document (perhaps as a document with a whole list of links).
- Turn the link into a QR Code
- Use a URL shortener such as Tiny URL , Tiny CC , Goo.gl , or Bitly
Viewing responses to your course
In one case people begin filling out your form, their responses will be saved to the spreadsheet linked to the form. You can become to the spreadsheet in a couple of means.
- From the edit screen on the class, simply click the View responses button.

- Or from your Google Drive screen, simply locate and open up the spreadsheet.
Once y'all have the spreadsheet open up you will encounter all of the user responses, one user per row, with each cavalcade holding the data for each question in the form.
But like with a regular spreadsheet y'all can perform many spreadsheet operations including sorting and filtering the information, creating charts, creating boosted sheets, adding information and formulas to unused cells, and such.
Viewing a summary of responses every bit charts and graphs
Google Forms can show y'all a summary of the responses in graph and nautical chart class. This can be helpful to identify trends or easily determine overall opinions.
To see this summary exercise the post-obit:
- If you have the form spreadsheet open, click Form and so Show summary of responses .
- If you are in the edit fashion of the form, click Responses and so Summary of responses .
In Summary view you will see:
- Bar graphs showing the frequency of responses to Checkbox , Scale , and Grid questions
- Circle graphs showing percentages of responses to Multiple Choice questions
- Total numbers and percentages for each possible response
- The first several responses for any of the Text or Paragraph questions
- A line graph showing the amount of responses per 24-hour interval since you shared the form
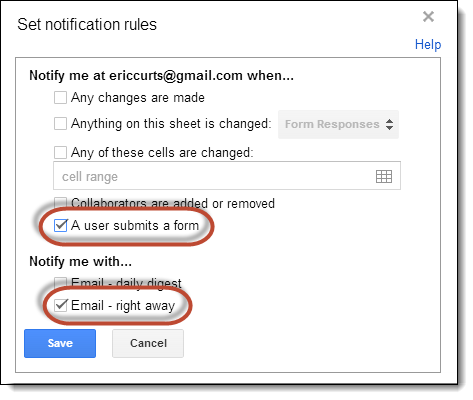
Getting notified when a form is submitted
If you take a grade that will be getting responses over a long period of fourth dimension, you will want to exist notified when someone new submits their responses. Y'all can configure the form spreadsheet to transport an email to you lot in such situations.
| |
More resources
- Bring me to your organisation: My preparation and consulting services - on-site or online - link
- All of my free training materials, help guides, presentations, videos, and more than - link
- View all of my Google Forms resources, preparation videos, and m ore - link
© 2010-201 half dozen - Eric Curts - ericcurts@gmail.com - www.ericcurts.com - plus.google.com/+EricCurts1 - @ericcurts
This document is licensed under a Artistic Commons Attribution Not-Commercial three.0 Us license. For more than information nearly this license come across http://creativecommons.org/licenses/by-nc/iii.0/ (In brusk, yous tin copy, distribute, and adapt this work as long every bit you give proper attribution and do not charge for it.) 
"Using Google Forms" - Eric Curts - Folio of
stoddardgurhander.blogspot.com
Source: https://docs.google.com/document/d/15i1AamaA_47cI-9Wc9Rw_A-Tr7h6yM0lp-xofJImgzI/mobilebasic?forcehl=1&viewopt=127